From the hardwoods to our cleaning station, we show you how to clean the iconic Nike Panda Dunks.

Sat amongst some of the greatest colourways to ever be issued from the Beaverton brand, the Nike Dunk Low ‘Panda’ is nothing but timeless. From its inception on our collegiate courts in ‘85 to its hefty catalogue of retroes throughout its 38 tenure, at Crep we thought it was only right to show you how you can keep these grails clean.
In this episode of To Do, we present our expert advice on keeping your ‘Panda’ Dunks clean, especially as the warmer days approach. So sit back and relax as we share our valuable tips for using our top-of-the-line Crep Cure kit.
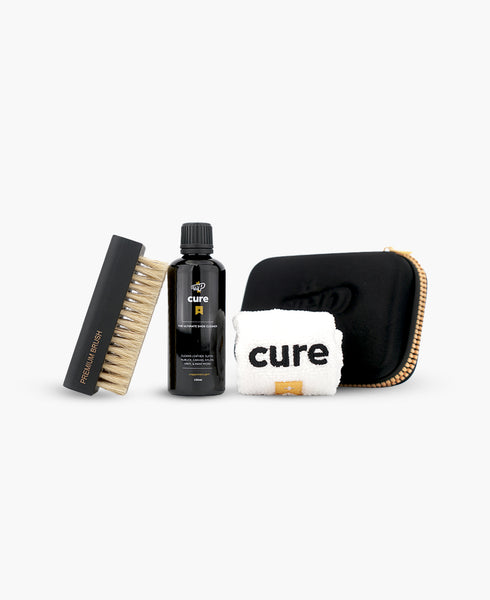
The Crep Cure Kit
Crep Protect Cure is the ultimate way to keep your sneaker clean, eliminating tough stains while being very gentle on those delicate materials. Within the Crep Cure kit, you’ll find a premium brush, 100ml cure solution, a microfibre towel, and a carry case with a built-in wash tray.

Getting Started
1. To start the sneaker cleaning process, take your premium brush and scrub off any of the looser debris and surface dirt off the shoe, ensuring that it is well-dusted and smooth as this will make the cleaning process easier to tackle.

2. Then take your carry case and fill it with water. We recommend using lukewarm water as this works best for lifting those tougher stains.

3. Once this has been completed, unlace the shoe so that it is prepped for scrubbing.
Outsole
Like any shoe we clean with the Crep Cure kit, we start with the outsole.
1. Dip your brush in the water and add 5 drops of the 100ml cleaning solution to the brush.

2. Start to scrub the rubber outsole, making sure that you follow all grooves and shapes as this maximises the amount of dirt that the solution can reach.

3. Once it’s all foamed and lathered up, wipe it down with your microfibre cloth. A good tip is to wipe upwards to remove any excess dirt.

Now that the outsole is fully cleaned, dip your brush back into the water and start the midsole.
Midsole
For the midsole of the Nike Dunk Low ‘Panda’, we want to pay closer attention to the stitching as well as applying pressure with our premium cleaning brush as this will lift the lid off those tougher stains.
1. Follow around the midsole, scrubbing in a circular motion as this will clean the stitching and the tiny grooves around the bottom.

2. Once it’s all foamed up wipe it over and let it dry.

Top tip: If you have smaller to-reach areas, use a damp microfibre towel and add a drop of cure onto it, this way you can run your finger along those smaller grooves so you can reach those smaller particles of dirt.
Uppers
As we move onto the leather uppers of the ‘Panda’ dunks, we recommend that you change the water in the tray so you can get the best cleaning results.
1. For the upper, add some more solution and start scrubbing the front of the shoe, working your way backwards, so you can easily see what needs to be cleaned. Once this has been completed, wipe off all foam to see if any spots have been missed.

2. If any spots have been missed, repeat the process until the shoe is well-cleaned.
3. Then let the upper dry and focus on the tongue and insides.
Tongue/ Insides
When cleaning the tongue and inside of a Nike Dunk Low ‘Panda’, it is the same process as cleaning the uppers of the shoe, however, more water will need to be added because it is a softer leather/ fleecy material.
1. Dip your cleaning brush into the water and add a few drops of cleaning solution and start scrubbing the tongue in a vertical motion.

2. For the inside layer, open out the tongue and softly scrub the insides at a raised angle, making sure you are also targeting the sockliner and any additional stitching.
3. After this has been completed, we recommend giving the shoe one more foam over and then leaving it dry. Leave your shoes to dry for 24 hours for the best results.
Laces
To finish off the cleaning of your Nike Dunks, you need to make sure you target the laces.
1. Dip your laces into your bowl of water, once they are damp, add a couple of drops of solution to the laces.

2. Rub the solution through the laces, similar to the way that you would wash your hands, this will help lift stubborn dirt.

3. Dry off and remove extra dirt with the microfibre towel and also let the laces dry for 24 hours.
Want to find out more sneaker-cleaning tips? Check out our How to Clean Your Air Force 1s blog here.
